Showing posts with label Mythic. Show all posts

Monday, May 30, 2011

Halo Reach: LASO Weekly Challenge Guide: Part 9 – The Pillar of Autumn: II

Time to finish this sucker off.  Good luck.

(See Part I here.)

The Pillar of Autumn Walkthrough (cont'd):


This first platform you come out to will be your base of operations. You will leave your Plasma Pistol here until it is needed. I will say now that credit for the strategy in the remainder of this guide goes to Tyrant, again. Tell him, "Thank you."


Halo Reach: LASO Weekly Challenge Guide: Part 9 – The Pillar of Autumn: I

Please follow the blog and follow me on twitter! Have any ideas or comments about the LASO guide or LASO in general? Post them down below!

Just like we all knew it would, it seems as though the curtain is coming to a close on these LASO challenges, though I would not be surprised to see the survival level Lone Wolf pop up for some sort of LASO challenge in the coming weeks.  Regardless, you still have to get through the Pillar of Autumn first.

This mission is no breeze by a long shot, but it is actually easier than you might think.  It just requires, like all LASO runs, patience and strategy.  There are some very trying parts near the end, but nothing that cannot be easily overcome.  Video of the run can be seen here and here.  If you need to review LASO strategies and tips, look here and here.

(Quick Note:  Many of the strategies here are from the fantastic Reach Mythic guides of Tyrant over at Halo.bungie.org.  All credit for these strategies goes to him or RC Master, who I believe found some of these tricks.  These guys are Mythic Gurus and if you ever have a chance, tell them "Thank you!")

The Pillar of Autumn Walkthrough:

The goal of this entire level is to get the package, the fragment of Cortana's memory, to the Pillar of Autumn in Azod.  You start out on a doomed Pelican piloted by Carter and you eventually jump out with Emile.

Monday, May 16, 2011

Halo Reach: LASO Weekly Challenge Guide: Part 8 – The Package: II

Please subscribe above this and/or follow me on twitter! Have any ideas, comments, or questions about the LASO guide or LASO in general? Post them down below!

Part I is here.
_________________________


Click through for the rest of the walkthrough.

Halo Reach: LASO Weekly Challenge Guide: Part 8 – The Package - I

Please follow the blog and follow me on twitter! Have any ideas or comments about the LASO guide or LASO in general? Post them down below!


So, you all getting tired of these LASO challenges yet? Do not worry, you are almost done. The Package is the second to last full mission of the game, followed by The Pillar of Autumn. I do not know what is going to happen with the Lone Wolf level, but I would not be surprised if it finds its way into a challenge with LASO in the name.

But back to the challenge at hand, The Package is actually much easier than you might first assume, but it takes time. The final part of the mission will prove to be the most frustrating, but if you use the level design and vehicles to your advantage, you should be fine. If you need to review any LASO tips and strategies, look here and here.


Click through for the walkthrough!


Monday, May 2, 2011

Halo Reach: LASO Weekly Challenge Guide: Part 7 – New Alexandria


Another two weeks and another LASO challenge on the plate.  We are getting pretty well along now.  After this guide, there will only be two more full-blown LASO guides; The Package and The Pillar of Autumn.  But, other things are in the works to fill the void that will soon appear.  For the moment, though, let us focus on New Alexandria, the seventh mission of Halo Reach.

All the same basic strategies of LASO still apply for this challenge.  This mission is definitely on the easier side, but do not let that go to your head, plenty can still go wrong for your really fast.  This mission also has some serious randomness to it.  Three main objectives can be thrown at you in any order with two small random side missions in between.  Buckle up.
Need to review LASO and some strategies?  Look here and here.

New Alexandria Walkthrough:


Intro

This mission will broken up into four sections: Club Errera, Sinoviet Center, Hospital, and Finale.  The order in which you will need to accomplish the first three objective will be random.  This guide has been geared towards helping you get the objectives in any which order

As you first start the mission you will be dropped off and meet up with Carter briefly.  Quickly, you will board a Falcon and become, basically, a mobile gun-platform.  If you do this run through on full SLASO, you will need to become very familiar with your surroundings since you will have no HUD to show you your location.   
Here is Club Errera.  

Here is the Sinoviet Center.


And here is the Hospital.

There will be two side missions you will need to complete in between these main missions.  Here is a great guide for them from Halo.Bungie.Net.  Reference it whenever you are at a loss on the side mission.

Monday, April 18, 2011

Halo Reach: LASO Weekly Challenge Guide: Part 6 – Exodus: II

Please follow the blog and/or follow me on twitter!

See Part I here.
Well, let's jump right into it.

Halo Reach: LASO Weekly Challenge Guide: Part 6 – Exodus: I


Please subscribe above and/or follow me on twitter!

Another two weeks have passed and it is now LASO time.  This week, we will be playing through the level Exodus.  Now, after the trials and tribulations of the last two LASO challenges (Tip of the Spear and Long Night of Solace), this week’s challenges is a refreshing change.  It is definitely easier but it still has its own challenges.

One of the more welcome changes for this level is the complete lack of Elites.  Brutes are a much easier opponent and tend to only have short-range weapons on this level.  The biggest threat on this level is any enemy equipped with a Fuel Rod Gun.  Make them a priority and all should be fine.  Another thing to remember is that this mission will have time where you have to grind down a lot of enemies.  Just be patient and stay calm.  Need to recap on what LASO means and some tips?  Look here and here.

Monday, April 4, 2011

Halo Reach: LASO Guide - Part 5: Long Night of Solace - II

See Part I here.


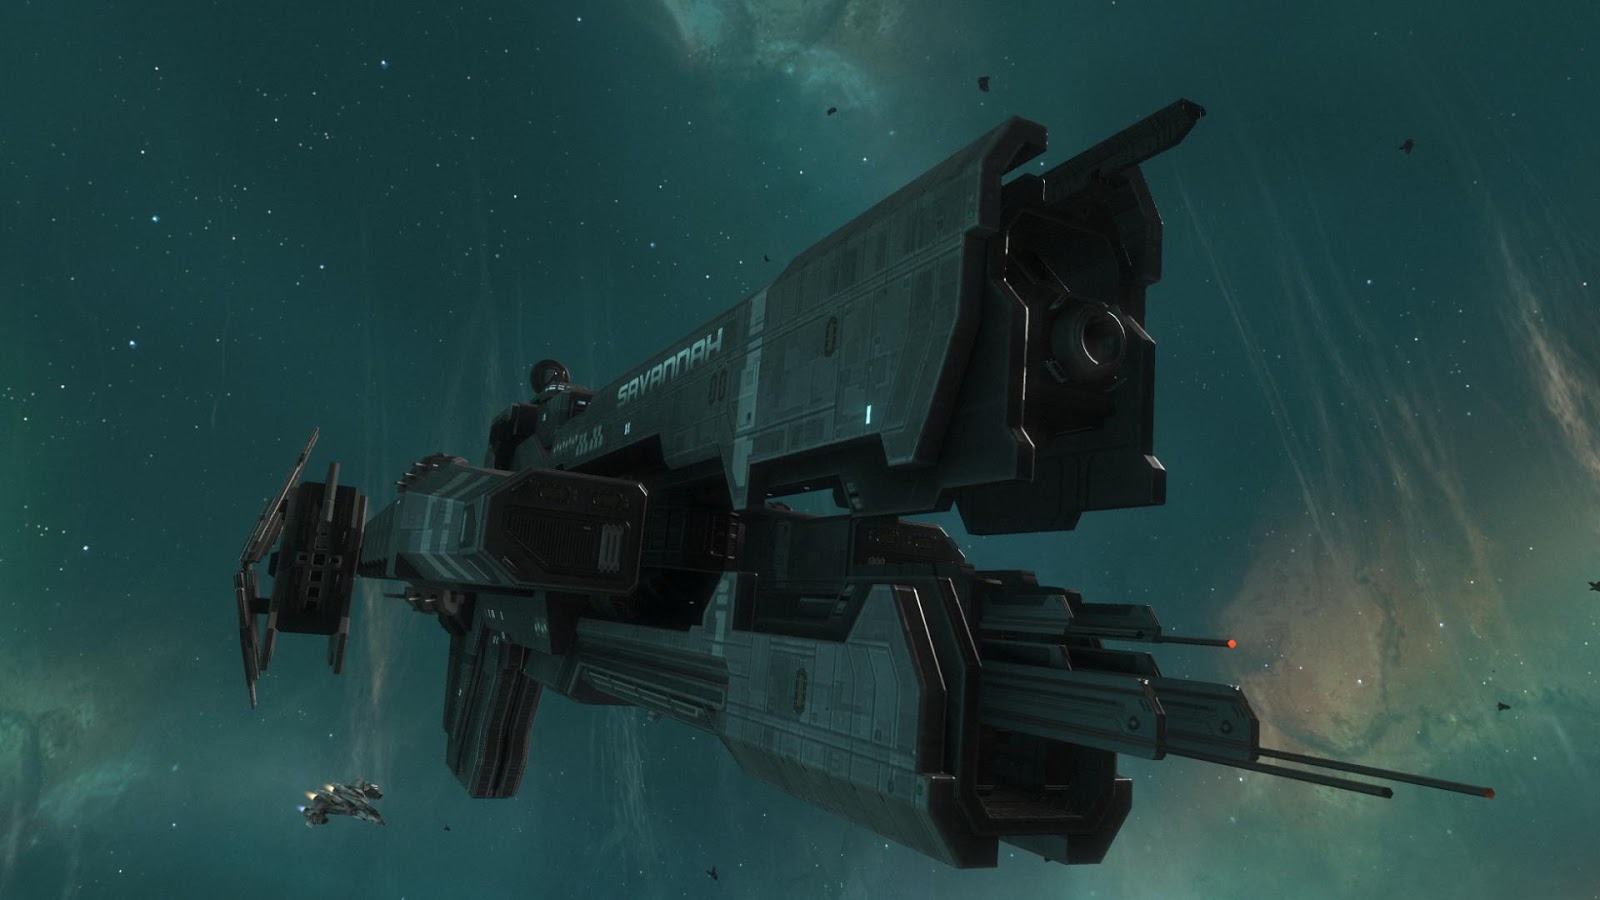
Now you will be assaulting a Covenant ship and using it to deliver the Slip-Space bomb. You will receive significant backup from the UNSC Frigate Savannah and you can use the Frigate to hide yourself while recovering shields and armor. The game will encourage you to attack the engines, but hold off until you have eliminate the ships initial escort, which consists of Banshees and Seraphs.

Some Help.

Once the escort is eliminated, maneuver behind the vessel and pour cannon-fire and missiles into the engines.

Engine Stopped.

Halo Reach: LASO Guide - Part 5: Long Night of Solace - I


Please subscribe to the blog and/or follow me on Twitter!

Has it already been two weeks?  That was a fast almost-fortnight.  I must apologize beforehand if there are some errors or mistakes.  I'm posting this quickly in the morning since I start a full-time job today.  (Wish me luck!) Any mistakes or errors will be fixed in the evening after I get back from work.

Now, Long Night of Solace on (S)LASO difficulty is a controller-breaker, without a doubt.  There are a few tricks that make this level easier, but not on the same level as Nightfall or Tip of the Spear.  The only one close to that is at the end of the mission.  This is another level that I would not do co-operatively because of Sabre space combat and the final part of the mission.

A major shout out is owed to Tyrant's Reach Mythic Guide at halo.bungie.org for the help it provided in a few key parts.  We see some of the strategy differently, but he does write some fantastic and comprehensive guides.
Need to review what LASO is and tips for it?  Look here and here.


Monday, March 21, 2011

Halo Reach: LASO Guide - Part 4: Tip of the Spear - II

Please follow the blog and/or follow me on Twitter!


Diving straight back into it - 

And here we will use another trick that is credited to the Mythic Guide at Halo.bungie.org.  Use the Checkpoints we will attempt to have both Wraiths kill themselves.  You will continually drive back and forth between the two points cause them to load constantly.  With any luck, both Wraiths will drive over the cliffside.  See the video for further info.


Halo Reach: LASO Guide - Part 4: Tip of the Spear I

Please follow the blog and/or follow me on Twitter!

Yes, it has been two weeks.  Of course, that means it is time for another LASO Weekly Challenge.  Following the order of the Halo Reach story, this week the mission is Tip of the Spear.  Bungie has done you a huge favor and is still not requiring the "Blind" Skull to be on.  This is a LASO guide, however, and, therefore, has been done with the "Blind" Skull on.  If you need to review LASO difficulty, look here and here.


And this will not be the five-minute cakewalk that Nightfall was.  Expect to spend a good hour or two pulling off this run because you will die a few times.  But, like Nightfall, this mission is very doable solo.  Even though this elevates the mission to SLASO difficulty, I believe it is preferable to having two players.  Remember, in Reach, the enemies scale up for multiple players, therefore making the mission harder.  The only advantage of having teammates is that you just go back to the last checkpoint when you die.


Monday, March 7, 2011

Halo Reach: LASO Guide - Part 3: Nightfall

Please follow the blog and/or follow me on Twitter!

Time to get the Weekly Challenge done, eh?  This mission is so incredibly easy that it belies logic.  And it only takes five to six minutes if everything goes right.  Check the video if you do not believe me (Also on Youtube).  There is one skill you need to perfect for this mission, however.  I'm talking about the "Beat Down."  Now, in Halo 3, a "Beat Down" was whenever you melee'd and opponent and kill them.  In Reach, that would be "Pummeled."

Now in Reach, a "Beat Down" is a melee from behind that kills an enemy without entering into an assassination animation.  What you need to do is quickly hit the melee button while behind an enemy but do not hold it at all.  This will perform a "Beat Down" instead of an assassination.  If you can perform a "Beat Down" on an unsuspecting enemy, you will not alert any nearby enemies unless they directly see you.  This is very useful for this level.
Need to review LASO and what it means?  Look here and here.


Tuesday, February 22, 2011

Halo Reach: LASO Guide – Part 2: ONI: Sword Base - II

ONI: Sword Base LASO Walkthrough Part II:

(Find Part I here.) 

Unleash Hell.

You can go either direction now, towards the Comm Station or the Anti-Air battery.  Most people seem to go towards the AA Battery, so let us do that.  There will be a small group of enemies but they are easily dispatched.  Drive your Wraith up onto the pond but do not pass it.  The General up there will nail you with a Plasma Launcher if you get to close.  Just bombard the base like crazy.

Bastard With Your Damn Concussion Rifle...

Halo Reach: LASO Guide – Part 2: ONI: Sword Base - I

Follow the blog for Halo news, guides, and updates or follow me on twitter.

Winter Contingency LASO Guide.
Here are some general strategies to remember for LASO difficulty:
  • Be a Team Player - Let your Teammates do the work.  The rest of Noble Team is invincible and has unlimited ammunition.  You are not and do not have that.
  • Avoid, Avoid, Avoid! - Avoid any fight or enemy that you absolutely do not need to engage.  Sometimes you will have to clear an area to continue the mission, but other times you can just sneak around.
  • Melee for Shields - Black Eye Skull is on, which means that meleeing an enemy will bring your shields back up.  If you are close in, with a low number of enemies, melee and make sure those shields are strong.
  • Sneaky, Sneaky - Crouch and you will find that you can sneak around quite a few enemies if they are far enough away.  Stick to walls and this will help you avoid fights.
  • Cover - Use it.
  • Assassination - The best way to deal with strong enemies, like Elites, is to assassinate them.  It is a one hit kill and a hell of a lot faster than the traditional method of killing them.
  • Two Player? - The Challenges are for beating the level on LASO difficulty, not SLASO (Solo, Legendary, All Skulls On).  Turn on a second controller and then you will not have to restart the entire mission every time you die.  The enemies will become slightly harder, but then at last you do have to be perfect through the entire level on its hardest difficulty.
  • Headshots - Headshot anything you can, because it kills them faster.  Enough said.
  • Mark the Spot - Get a small piece of paper and some tape, or just tape and a sharpie.  and Make a dot with the sharpie on the tape and then put the tape on your screen where the reticule should be.  Do not write on your screen, please. 
Now that you have brushed up on your LASO knowledge and strategies, let us get down to business.

ONI: Sword Base Walkthrough:
(Warning: This is a long walkthrough and contains spoilers.  Links lead to pics illustrating strategies.)
NOTE: Currently, the Challenge does not require the Blind Skull to be turned on.  Do yourself a favor and keep it off.  Do not get used to it though.

Kat will be your teammate for the majority of this mission.  You will start out in a courtyard outside Sword Base and are required to clear it and then to clear three other areas outside the base.  Then you will come back inside and clear out the base.  Obviously, you cannot run through much of this like Winter Contingency, but there are some tricks and shortcuts.

The Right Ramp.

At start, run up the right ramp and you will have an Elite one on one.  Melee, sidestep, and assassinate.  Watch out for the kick because it is lethal.  Grunts down below will probably go kamikaze so take them out before they kill your second player since he is just a stand in.

Melee, Sidestep, and Assassinate.

Now you will want to sneak across the small foot bridge and got to the opposite side.  There will be a pair of Jackals there that you can possibly flank plus some ammo, grenades, and a health pack.  Try to clear this upper walkway entirely.

Halo Reach: LASO Guide – Part 1: Winter Contingency

Follow the blog and/or follow me on twitter for future LASO/Mythic Guides.


Joy riding...

At the start of this level, you will be riding in a Falcon with Carter and Jun.  Once you land you do not need to stop at any of the locations.  You can simply keep sprinting.  If you have a team mate, or are a really good shot at distance, with the pistol, without a reticule (I severely doubt anyone is), you can try to take out the Cloaked Elite at the very beginning of the level for a datapad.  He is cloaked and running from the burning Warthog as you near the area.  Do not worry if you miss him though because he is not vital.  

Down
 Once you reach the area where the Covenant reveal themselves, go down the stairs and then go right back up.  The point is to trigger the rest of Noble Team to go down and wipe out the Covies for you.  Always remember that the AI members of Noble (A.K.A. not you) are invulnerable and cannot be killed.  Treat them like tanks; they plow through and you follow behind.

An Intro to LASO/Mythic Difficulty in Halo Reach.


On the heels of the current weekly challenge, tempting members to try the second level of the Halo Campaign on LASO difficulty, I present this guide which will help the not-so-hardcore members of the Halo population a fighting chance at completing this challenge and hopefully beating the whole game this way.